Friday, May 15, 2015

New Signs


I have been painting signs again, after a 8 year break!  Kind of in love with anything octopus now-a-days!!  And of course mermaids, I will always love them!

Tuesday, April 21, 2015

~NEW WEBSITE~

Hey there!
I keep forgetting to let you know that I have a new website, and I guess, because of that I have been ignoring this page.
Go check it out, follow it, catch up!


There is a lot of new work posted on the new site.
New information on classes that take place in my studio, in Abaco, Bahamas.

Wednesday, January 15, 2014

~~Happy 2014~~

Happy New Year!!
The beginning of a new year can be so refreshing and stressful all at the same time.  I have so many ideas, goals, things I want to do, that my mind is just overflowing!
There are my business & creative goals and then my personal ones.
The last three months of 2013 kept me very, very busy between new creations, sales, shows and teaching.
I will continue my quilting classes in February and I am hoping that there will be some interest in classes in some other mediums.
I have updated the Classes page on this blog, so click on that to see what I will be offering.  There is only one class posted so far, but more will be posted over the next few weeks, so keep checking back.


I love to teach, but most of all I love to help people achieve that feeling of accomplishment when they have finished a project.  I believe that everyone has a streak of creativity.  It is just a matter of tapping into it and helping it flow.


Another of my creative goals, for 2014, is to bring back a few items that I made in the past.  I have had many customers asking about them so I thought I would reinvent them to some degree and offer them again.
One of the items will be my quilted silk pillows, but they will be totally different from the ones I did previously.  Below are the quilted silk pillows that I made several years back.  I am in the process of redesigning them.
{There will also be a silk painting class offered in 2014, so keep checking the Class tab on this blog}


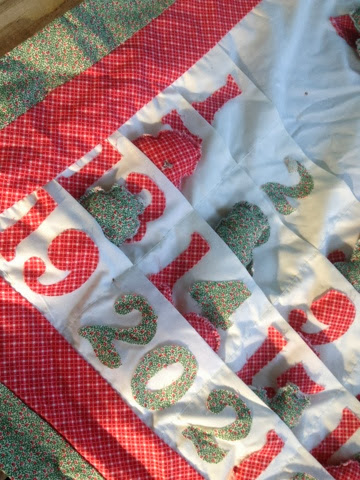
Another *new* or recreated item I am working on are my Bahama Mama Quilts.  Remember these....?


I am currently getting ready for Art for the Parks, which is January 24th, 25th & 26th.  I will have new items as well as class samples for the classes I am offering in February and March 2014.  Hope to see you there!

~~~Have a Happy & Creative 2014~~~


Thursday, October 31, 2013

Something New from Something Old

Since Halloween is wrapping up I am starting to get Christmas on my
mind.  Waaaaaaay back when I was about 12, I made this advent calendar.  Every year I find it around February, long after Christmas, tuck it away being sure I will remember where I hid it, then Christmas comes and lo & behold I can't find it!  It would be way too logical to put it with my Christmas decorations!

I was on a mission this weekend to find it and I did!!!


It's pretty pathetic!  I can't even figure out what some of the ornaments are!


I am trying to decide if I should make a new one and keep this for old times sake, or redo this one......


I am leaning towards making a brand new one with this same concept.  It will be good to keep this one to look back on.  I didn't even stitch down the numbers!!!!  And my mom proudly hung this in the dining room every year! WOW!


Since I began writing this post I also found the original pattern.


I have also been doing some brainstorming and doodling.  I even wake up in the middle of the night thinking about this.


Just trying to decide on a color scheme, greens with fuchsia or greens with royal blue.
Stay tuned to see how this renovation goes!  I've got one month to complete it!

Thursday, October 17, 2013

A Little Bit of This & A Little Bit of That!

In between real work and orders I have made a few more fall items for me.


These Halloween place mats just need some binding.  The little 3 inch blocks are from an online group I was in a few years ago.


Started a few more clay characters that just need paint now.


And finally a copper owl ornament.  {Well, not really *finally*....got a few more projects I haven't taken pictures of yet....my insomnia is coming in handy lately!}
I just LOVE Fall inspired crafts!

I have also been putting the finishing touches on my first (in a long time) quilting class, which will start in November.  A Christmas Table Runner.
There are just a few more spots left in this class so if you want to join the fun contact me soon!


Also busy filling shop orders.....


And building inventory for online sales and a few holiday shows.  I will not be at Jollification anymore.  Things just weren't working out for me to go, but it is just as well since the work is piling up!


Leather cuff bracelet, above with dangles.  The dangles are a silver heart charm, 3 word charms and a seashell.
I will soon be letting you know about some new stores that will be carrying my creations, so stay tuned.    Until then, I will be at Da Market, here in Abaco ~ October 26th, November 30th and December 14th!

Thanks for stopping by to see what I am up to!


Friday, October 4, 2013

A Paperclay Tutorial for You!


I am going to be showing you a tutorial for making an ornament/wall hanging using Paperclay, fabric and a few other embellishments.


You will need the following supplies:
1 - 8oz package of Creative Paperclay
A scrap of fabric approximately 3"x4", for the front
A scrap of fabric 1"x10"
A small piece of lace
Ribbon or lace for hanger, about 8"
A scrap of batting that is slightly smaller than the top fabric
A backing fabric, same size as top fabric
Acrylic paints in colors you want to work with
Antiquing medium
Mod Podge
A sewing machine with a matching/coordinating thread
Paintbrushes
A rag

The first step is to find some fabrics in colorways that you would like to work with and cut (or tear like I did) one fabric piece to approximately a 3 inch by 4 inch piece.  When I got that piece to the size I wanted, I painted it with a thin layer of Mod Podge.


Now comes the fun part....working with the clay!  I tore off a piece of Paperclay about the size of a pingpong ball.  I like to keep my clay moist (not wet) so I work with damp hands.  Work the clay into a ball and then start pulling a point down to form the bottom of the heart.


I then make a space at the top to form the two top mounds of the heart. When I get a basic heart shape I press it onto the fabric while the Mod Podge is still wet.
Then using my finger, or sometimes a clay tool, and working with a little water, I start to work the edges of the heart into the fabric.


Use a little water to get everything smooth, and smooth out any cracks you can see.  While the Paperclay is still fresh and wet, find your favorite stamp or texture tool and make an impression of texture on one side of the heart.


I also took the end of a paint brush and pushed in shallow dots on the other side of the heart, because everything is better with polka dots!! RIght?


Now comes the difficult task of waiting....waiting for this piece to dry.  It usually needs over night to be properly dry.
When it is dry paint it with your favorite colors that compliment or coordinate with the background fabric.


I like to use aquas and greens because if you put an antiquing medium over this it looks almost patina'd.  So since I mentioned it....let's antique this heart.  Wait until the paint is dry and then apply a thin coat of antiquing medium over it, then take a rag and wipe it off until you get a look you like, making sure to leave some in the grooves of the textured design.  Set this aside to dry.


Now we need to gather a few more items, like the above photo on the right shows.  You will need a scrap a batting that is slightly smaller than the heart piece, a backing fabric, a few torn strips, and perhaps another scrap of embellishment.
Make a sandwich out of the fabric-heart piece, the batting, and the backing fabric....in that order.
Trim (or tear) piece to desired, finished size.  I personally like the look of the torn fabric and loose threads.


Take your little quilt and Paperclay sandwich to the sewing machine and do some stitching around the perimeter of the piece, probably about a quarter of an inch from the edge.


After I got the perimeter stitched all around a few times I took a few torn fabric strips that were about an inch wide and accordion folded them and stitched them down to the bottom of the piece.  Basically I fold the fabric and hold it in place while I stitch it down.  Fold as you go method!


I also added a small piece of vintage doily and a short piece of fabric, on top of the folded fringe, just on the left side.


I then, free-motion stitched the word *Goodwill* to the right hand side of the quilting piece.  If you are not comfortable stitching like this you can stamp on a word or write it on with fabric markers.
This is a good point to stitch on a ribbon or fabric hanger to the top corners of the piece.  I used a long piece that was cut off the vintage doily to match the doily on the bottom fringe.


The final step.......
To give everything a good seal and make it stronger I give it one last coat of Mod Podge over the Paperclay heart and a little bit of the surrounding fabric.  Any clear sealer will work well for this.


Here is the finished piece.......


Also thought I would show you another piece I did, alongside the piece in this tutorial.  The piece on the right has a wire hanger and a bit more fabric fringe on the top.


There are endless possibilities with these ornaments!  When I was photographing these I was envisioning some with pumpkins.....I think I am going back into the studio to play with some more Paperclay!
Have fun creating with Paperclay and be sure to check out all the other blog posts via the link at the top!

LinkWithin

Related Posts with Thumbnails